ASP.NET Core default project structure explained (part 1)

Introduction
When you start learning a programming language, one of your first exercises will probably be to write a “Hello World” application to figure out the basic concepts. This exercise works well if you’re writing a simple console program that will only print out the greetings on the screen.
However, once you move onto learning to write web apps using a new framework, such as ASP.NET Core, such a simple code is not enough — partially because web apps are more complex. And also because, right off the bat, the tools and frameworks used for writing web apps try to introduce advanced techniques and approaches for building and maintaining them once they scale.
It all can seem like too much for a beginner. Here we will take apart the default ASP.NET Core solution template piece by piece, then figure out the purpose of each piece and how exactly it works.
Please note that this isn’t a full-scale tutorial on all the aspects of creating web apps in ASP.NET Core. Rather, it is a short guide where you can check why a particular part is added to your project or find a piece of code and a link to the relevant documentation that explains it in detail.
As an example, I used a new solution that targets .NET 5. However, most of this article's information will also be relevant for the ASP.NET Core projects that target .NET Core 3.1 or the upcoming .NET 6.
Creating a New Web Project
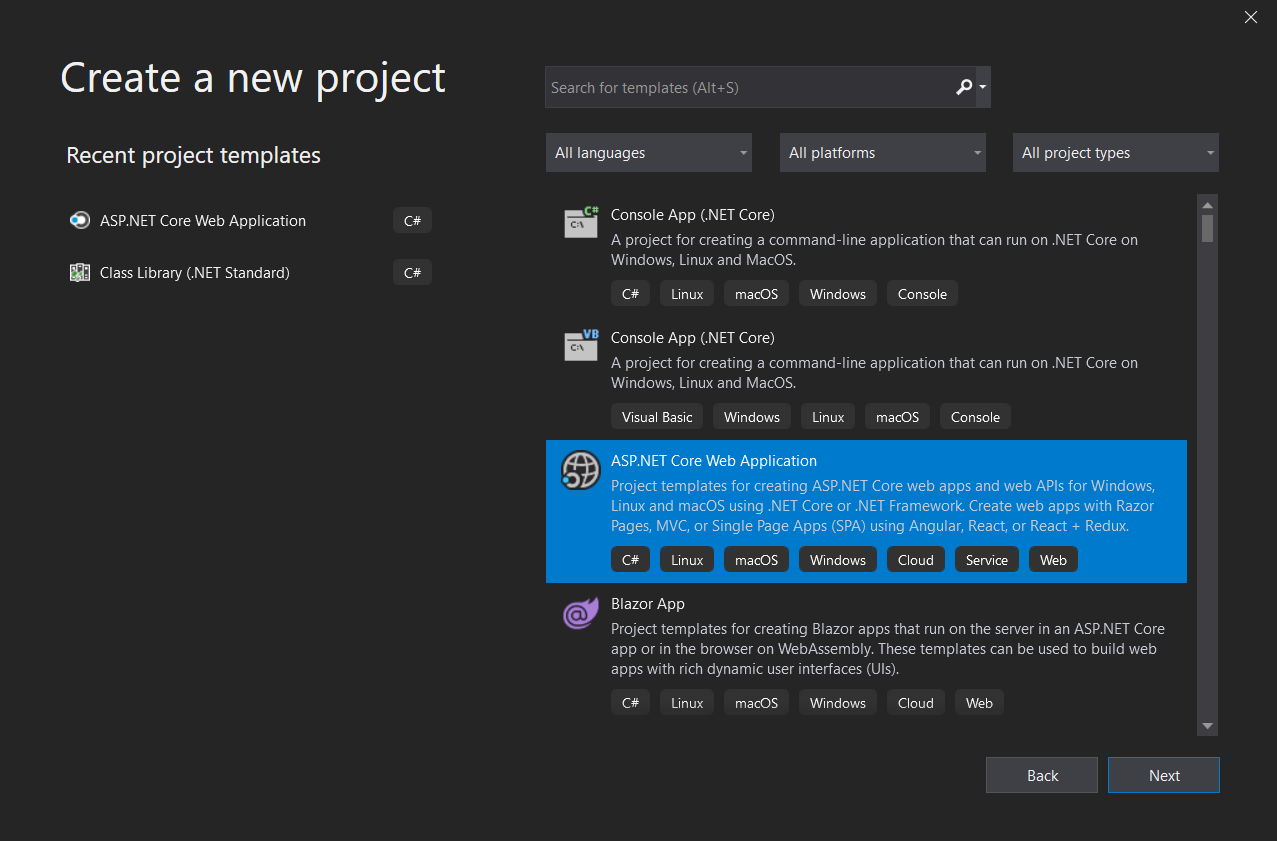
Let’s start with creating a new empty web app with the “Create a new project” wizard in Visual Studio.
Here is how this step should look:
When you press Next, the wizard will ask you to choose the names of the new solution and project and the folder to place the solution files in:
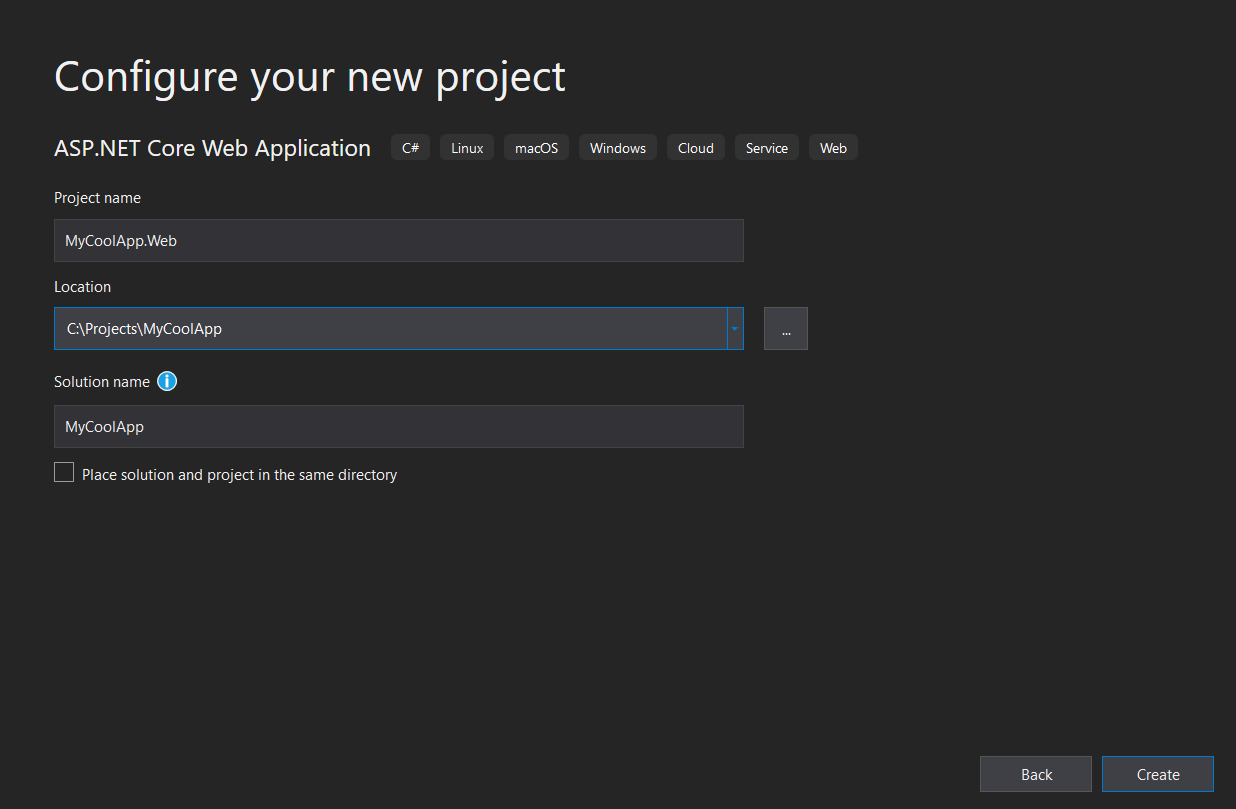
Tip #1: Place the project and the solution into separate folders. Choosing the same location for both is convenient only for very small applications. Once you start adding other layers to your solution (domain classes, data layers, API, etc.), having them in separate projects will be more practical.
Tip #2: Use the general name of your application for the name of the solution (like “MyCoolApp”) and add the “.Web” suffix for the project name (e.g., “MyCoolApp.Web”).
Finally, you will need to choose some additional project options.
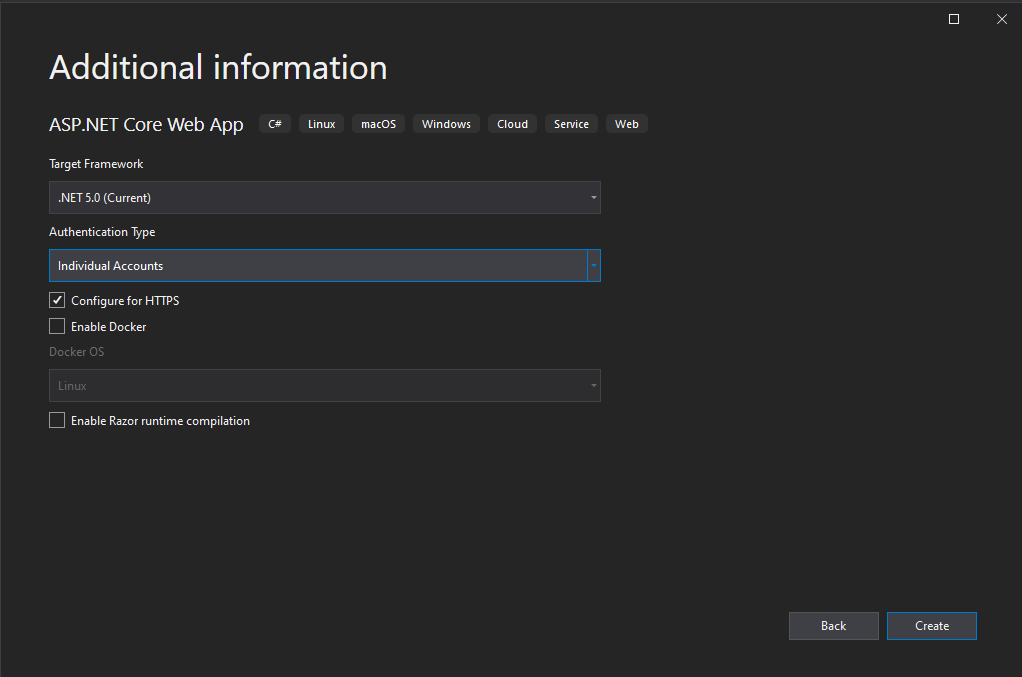
The most important options here are:
-
Target Framework. I suggest selecting the latest one (for the moment), .NET 5, but all the information in this article is relevant for .NET Core 3.1 or .NET 6 (it’s in the pre-release state now) projects as well.
-
Authentication Type. In this article, we suppose this option is set to Individual Accounts. This value means that our new web project will contain some means for managing user accounts and provide UI for the basic authentication operations: Login, Registration, Reset Password, etc.
Let's click on "Create" when everything is set and get our new solution.
Project Structure
After finishing the steps described above, you will get a new solution with one project inside it.
The structure of that project will look similar (or even the same) to the following one:
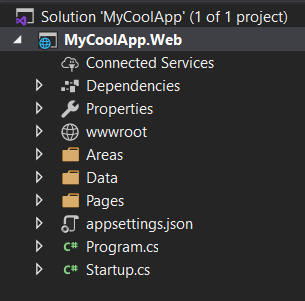
Let’s take a closer look at each part of your new project.
1. Connected Services
This is the first node in your project’s structure and possibly the less-used one. It is intended to automate the multiple steps necessary to connect a project to an external service (like Azure Storage or Application Insights). You can right-click on this node and select “Add connected service…” to run a wizard that will lead you through the process. Usually, it just adds necessary packages and gives you basic instructions on how to start using your app's service. As I’ve already mentioned, there is a good chance you will not use this node during your project’s lifetime.
2. Dependencies
This element of your project structure contains all packets or other projects on which your project depends.
There are four main folders inside this node:
- Analyzers
They help you make your code better: cleaner, error-free. Each analyzer checks that your code satisfies a list of rules incorporated in it. If any part of your code does not apply to one of the rules, you will see either a Warning or an Error while you build your project.
Please note that analyzers work only at compile time and do not affect your resulting application.
- Frameworks
This folder contains a list of frameworks your project depends on. This information is important if you publish your web app as a runtime-dependent (as opposed to a self-contained one). In this case, all the frameworks listed here must be installed on the server where you will run your app.
NB: You can use
dotnet --infoconsole command to check the list of installed frameworks.*
-
Packages
This is the main item in this node. It lists all NuGet packages you added (installed) to your project. If any of those packages depend on other packages, they will be installed automatically and listed as sub-nodes of the root-level packages. You can remove each installed package here (right-click / Remove). -
Projects
This is the list of other projects in this solution your current project depends on. You can reference other projects using the “Add reference” command from the right-click menu. Obviously, this node is empty now since we have only one project in the solution.
3. Properties
This part contains different properties of your project that you can modify by double-clicking on this node in the Solution Explorer. Most of the properties there affect the compile- and debug-time behavior of your project.
The only item inside this node is a “launchSettings.json” file containing the launch profiles. Each profile defines how to run your project when you click on the “Run” button in Visual Studio.
4. wwwroot
This folder contains all the static files of your web application: CSS files, JavaScript files, images, and icons. As you might figure out from its name, this will be the root folder of your web app. So if you put an “image1.png” file into the “wwwroot/images/dir1” folder, it will be accessible in the browser by the “/images/dir/image1.png” address.
5. Areas
This folder is added because we selected the “Individual Accounts” value for the “Authentication Type” option when created the project.
In addition to the core authentication/authorization packages (which is called ASP.NET Core Identity), the default template also adds the “Microsoft.AspNetCore.Identity.UI” package. This is a Razor-class library that contains all forms and partial views for authentication and user management: Login, Registration, Reset Password, User Profile, and many others. All these forms will use your layout (defined in Pages/Shared/_Layout.cshtml) and so will match your website’s design.
However, you still might want to change some of those forms (or even all of them). In this case, you can use the Scaffold command and add the necessary files to your project. The scaffolded files will be added to the Areas/Identity folder.
6. Data
As in the previous case, this folder appears in our new project because of the “Authentication Type” option that was turned on at the beginning.
By default, all user-related information (users, their roles, claims, etc.) is stored in a database accessed with Entity Framework Core ORM (object-relational mapping) framework. If you are not familiar with EF Core, you can find a lot of tutorials on Microsoft Docs.
The “Data” folder contains your DB context class named “ApplicationDbContext.” This class is derived from the “IdentityDbContext” class defined in the “Microsoft.AspNetCore.Identity.EntityFrameworkCore” assembly, and it includes all DB sets (tables) necessary to store user-related information.
You can use this class or create another DbContext class to add your models.
Additionally, the “Data” folder also includes “Migrations” sub-folder with all your Entity Framework Core migrations.
7. Pages
This folder contains all pages (forms) of your web applications. ASP.NET Core has two default approaches for content rendering: MVC (Model View Controller) and Razor Pages (which is, actually, a kind of MVC, where each controller and the corresponding view are stored together). Both approaches use Razor syntax that you can think of as HTML + C#.
Each Razor page is represented by a “.cshtml” file. The code related to it is stored in a so-called “code-behind” file with the same name and a “.cshtml.cs” extension.
From the start, the “Pages” folder contains a few default pages, such as Index (the home page of your web app), Privacy, and Error. Additionally, you can find the main layout file (_Layout.cshtml) and some partial views in the “Pages/Shared” folder.
NB: It’s a common practice to prefix the names of the layouts and partial views with _ symbol.
8. Root Folder Files
Now, when we’ve looked over all the main folders created with the default ASP.NET Core application template, let’s take a closer look at the files stored in the project’s root folder. They are the most important part of the project.
Program.cs
This file defines the “Program” class with one static method, “Main,” which is the entry point of your web application.
The only purpose of this method is to define the host and then pass the control to the Startup class. For more information about the default host builder, look at an article about Generic Host on Microsoft’s Docs.
application.settings
This is a JSON file that stores the application’s settings. The settings have a hierarchical structure and can be accessed with the Configuration object defined in the Startup class or in any other place of your program where you injected IConfiguration service. For example:
var defaultLogLevel = Configuration.GetValue<string>("Logging:LogLevel:Default");
The different levels of hierarchy are separated by the colon (:) symbol.
By default, in addition to “application.settings”, the ASP.NET Core template also includes an “application.Development.settings” file. The settings defined in this file are loaded only into the Development environment and are not available in production. To learn more about the “.settings” files and configuration in ASP.NET Core projects in general, please read this article on Microsoft’s Docs.
Startup.cs
This is the final part of the ASP.NET Core project’s structure. The “Startup” class serves three main purposes:
-
It performs all initialization tasks (setting application-wide constants, DB seeding, migrations, etc.).
-
It registers all services used in this project in the DI (dependency injection) container.
-
It defines the middleware pipeline of your web-application.
This class contains a lot of code (as for a project that has just been created) from the beginning and will become even bigger when you start adding new features to your application.
We will take a look at it in more detail in the next article.